Permission set and Explain with Example
Introducing Permission Sets:
Like a profile, a permission set is a collection of settings and permissions that determine what a user can do. Permission sets include some of the same permissions and settings you’ll find in profiles.
- Object permissions
- Field permissions (also known as “field-level security”)
- User permissions
- Tab settings
- App settings
- Apex class access
- Visualforce page access
So why profiles and permission sets?
The most significant difference between the two is that users can have only one profile, but they can have many permission sets. This means you can use profiles to grant the minimum permissions and settings that every type of user needs, then use permission sets to grant additional permissions, without changing anyone’s profiles.
There are a couple of ways to use permission sets to your advantage.
- To grant access to custom objects or entire apps.Let’s say you have many users in your organization with the same fundamental job functions. You can assign them all one profile that grants them all the access they need to do their job. But suppose a few of those users are working on a special project and they need access to an app that no one else uses. And suppose a few other users need access to that app, as well as another app that the first group doesn’t need. If we only had profiles, you’d have to create more profiles that were customized to those few users’ needs, or take your chances and add more access to the original profile, making the apps available to users that don’t need it. Neither of these options is ideal, especially if your organization is growing and your users’ needs change regularly. Permission sets make it easy to grant access to the various apps and custom objects in your organization, and to take away access when it’s no longer needed.
- To grant permissions—temporarily or long term—to specific fields.For example, let’s say you have a user, Dana, who needs temporary edit access to a field while her co-worker is on vacation. You can create a permission set that grants access to the field and assign the permission set to Dana. When Dana’s co-worker returns from vacation and Dana no longer needs access to the field, you just remove the permission set assignment from Dana’s user record.
We’ve created two profiles for our easy-to-define job functions. Now we need to grant additional access for functions that may not be specific to any given job title.
- From Setup, enter Permission Sets in the Quick Find box, then select Permission Sets.
- On the Permission Sets page, click New.
- In the Label field, enter Hiring Manager.
- The API Name field is defaulted to Hiring_Manager. Let’s leave it as is.
When you assign permission sets to a user, you can only assign permission sets that have the same user license as the user or permission sets with no associated license. You can’t change the license later, so it’s important to choose the correct user license when you create a permission set.
- In the User License field, select Salesforce.
- Click Save.
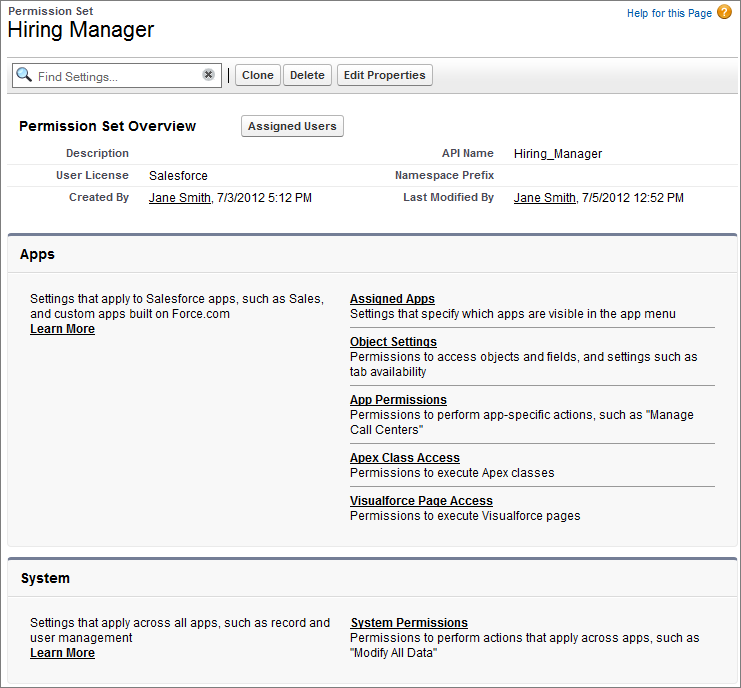
Permission Set Overview Page
We’ve taken the initial step of creating a permission set. While you can clone permission sets, you can also create one completely from scratch, and that’s what we did when we created this one. At the moment, this permission set has no enabled settings or permissions—it’s a blank slate. So let’s enable some permissions and settings. Since this permission set is for hiring managers, we’ll start by making the Recruiting app visible.
- Click Assigned Apps.
- In the Assigned Apps page, click Edit.
- Under Available Apps, select Recruiting and click Add to add it to the Enabled Apps list.
Assigning the Recruiting App in the Hiring Manager Permission Set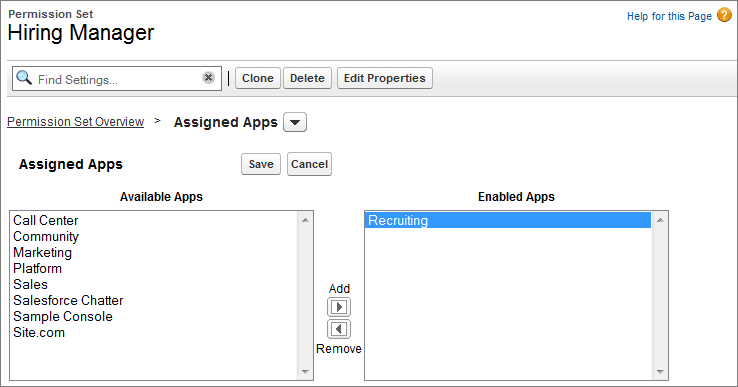
- Click Save.
Next we want to enable tab settings and permissions for our custom objects. Where are those enabled and how do we get there? In permission sets, you have a few easy ways to move from one page to another. Let’s take a look.
- Next to Assigned Apps, click the down arrow to open the navigation menu, and select Object Settings.
Permission Set Navigation Menu 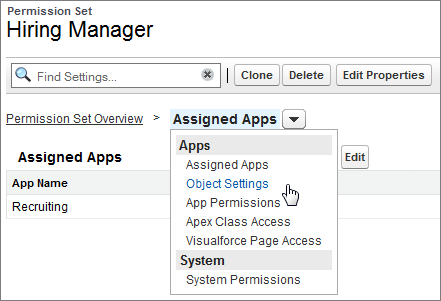
The Object Settings page shows an overview for all objects and tabs in your organization. It includes a summary of tab settings, object permissions, and field permissions for every object and tab. Let’s drill down to the Positions object.
- In the list of objects, click Positions.
- On the Positions page, click Edit.
You may notice that tab settings labels in permission sets are different from the labels in profiles. They are configured a bit differently, but you’ll get the same results.
- Under Tab Settings, select Available and Visible.
- Under Object Permissions, enable Read, Create, and Edit.
Now we’ll grant access to the fields in position records. We’ll learn lots more about field permissions in Introducing Field-Level Security, but for now, we’ll enable the field permissions we need.
- Under Field Permissions, enable the Edit checkboxes for all the fields.
You’ll probably notice that you can’t change the settings for some of the fields. These fields have preset access because they are required or their data is automatically calculated. For example, because Days Open is a formula field, it’s never editable, but you should make it readable.
- Enable Read for Days Open.
- Click Save.
Now we need to specify access for our remaining objects. As we saw previously, you can use the navigation menu to quickly jump from one page to another. On the Positions page, notice that there are now two down arrows: one next to Object Settings, and another one next to Positions. Whenever you’re in a specific object page, this second navigation menu is available. Click the second down arrow and you’ll see all of the objects and tabs in your organization.
Object Navigation Menu 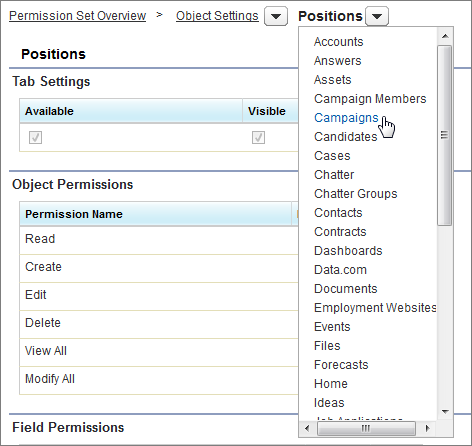
But that’s not the only way to jump around in a permission set. Another option is the Find Settings... box, which is available on every page in a permission set. Here you can enter three or more consecutive letters of an object, setting, or permission name, then select the item you want from the list that appears. Let’s try it.
- Click in the Find Settings... box and type job.
There are two objects with the string “job” and they both appear in the list.
- Select Job Applications.
Using the Find Settings Box 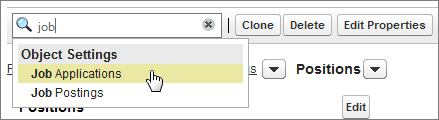
Now that we know how to move around easily in a permission set, go ahead and add the rest of the permissions and settings, according to this table.
Great! We’ve created our first permission set and added the settings we need for hiring managers. Now we’ll create another permission set for a different job function, interviewing candidates.